In a previous article, I wrote about how to harden one’s home against intruders, which detailed how to make a home far more difficult to enter.
In these tumultuous times, we have seen too many examples of riots, looting, and unrest sweep across the globe. Whether it be civil unrest, protests turned riots, or pandemic related panic many events can see the criminal element and looters at your property line.
In these cases, sometimes a good offense is the best defense, and having an early warning system in place can and will be the deciding factor in the security of your home. With a few items from around the house, you can build some tripwire triggers that will act as an early warning system to alert you to where intruders are entering your property.
The Legal Stuff
What I am describing is what‘s commonly known as a ‘booby trap’. While these early warning systems are not designed to inflict any harm to those who trigger them, it is up to you to research the rules, regulations, and laws regarding such devices in your area.
The Traps
These two traps, whose construction I will detail, have similar purposes but they achieve them in different ways.
The first is very simple, a rat trap, paracord, zap straps, and a glowstick is all you will need to be alerted to where the bad guys are. This method has a significant issue which is that the only way you will know that the trap is triggered is to be looking at it, this means someone in the house has to be on watch looking towards the trap to see it get triggered.
The second is not overly complex but requires some electronic components and a little bit of experimentation. The idea behind it is that when the trap is triggered a LED light will alert you to an intruder.
The Rat Trap
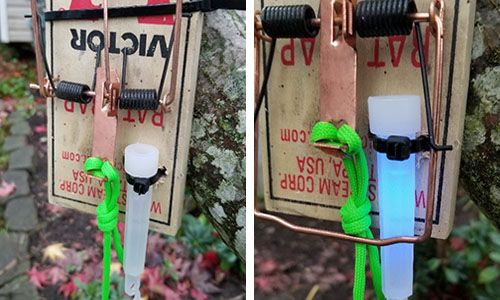
The first trap I will describe is by far the simplest and requires minimal equipment and skills to construct. It works by placing a glowstick in such a way that when a rat trap is triggered the spring arm of the trap snaps closed on the glowstick shattering the vial inside of the stick. The trap is triggered by a tripwire of paracord, bank line, or wire.
Materials
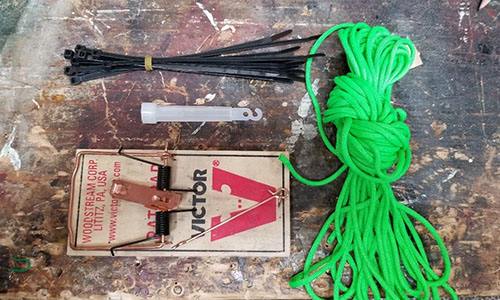
- 1 – Rat Trap
- 1 – Glowstick
- Paracord
- Zap straps
- Drill and drill bit
Instructions
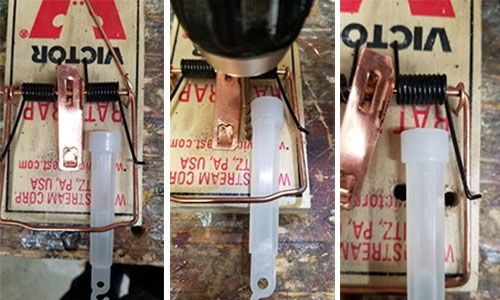
Step One – Determine where the glowstick is going to mount on the rat trap. Then drill holes on either side of the glowstick to accommodate a zap strap.
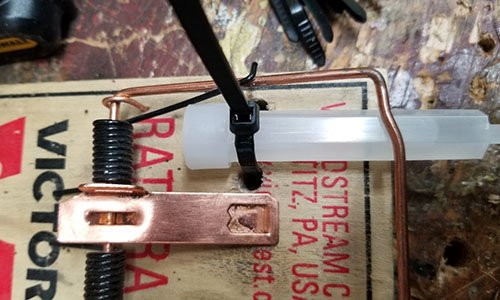
Step Two – Mount the glowstick using a zap strap making sure that the glass vial inside will be broken by the spring arm when the trap is triggered.
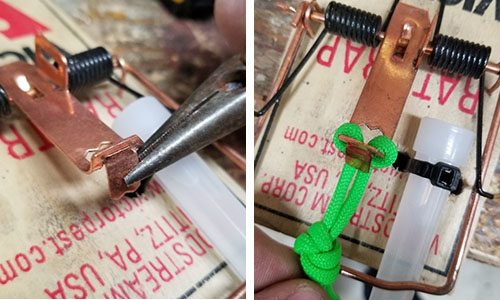
Step Three – Attach paracord to the trigger of the trap. You may want to modify the trigger to make it easier to attach the cordage.
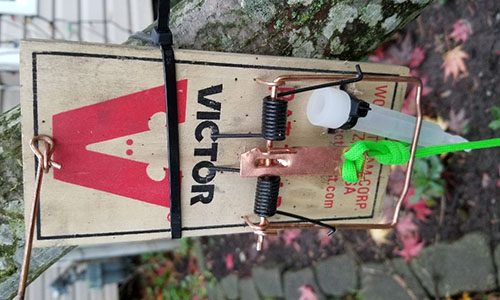
Step Four – Mount the trap in a suitable location then run the paracord to form a tripwire. Do not securely tie it off yet since you have yet to set the trap.
Step Five – Set the trap as normal and very carefully adjust the tripwire keeping in mind that because of how sensitive the trigger mechanism is the tripwire will not be taut. Also, the longer the tripwire the heavier the line and in turn, the looser it will have to be. It is best to keep these lines short or made from lightweight materials.
The LED Trap
This trap requires a few electronic components which you can easily find or scavenge from old electronics. For this article, I have shown the simple circuit on a breadboard, but you will want to assemble the components more permanently through soldering.
#1. An important point of note is that I have not specified a value for the resistor in this circuit. The reason for this is that the longer the run of wire you need to use the greater the resistance that wire will provide the circuit and in turn, there will be an associated voltage drop. When constructing this circuit, test it using the full lengths of wire to ensure that the LED’s light to your satisfaction. Do this before placing the traps in position.
#2. Use a separate power source for each trigger. You may find that it is better to use higher voltage batteries for this project depending on how long the runs of wire are.
#3. One advantage of this trigger is that you can place the LED’s on a cardboard map of the property.
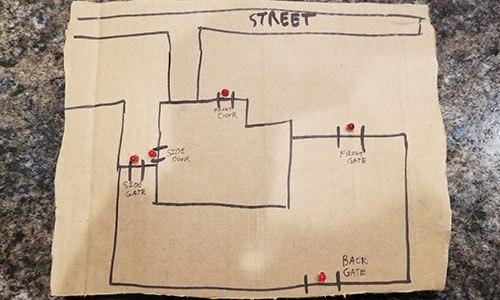
In this way, you will have a visual representation of exactly where the incursion is taking place.
Materials
- Wooden or plastic clothespin
- Length of two lead insulated wire of a thin gauge. It needs to be long enough to run from your tripwire location to where you are going to install your warning light.
- Resistor
- LED bulb
- 9-volt battery connector
- 9-volt battery
- Electrical tape
- Metal tape
Instructions
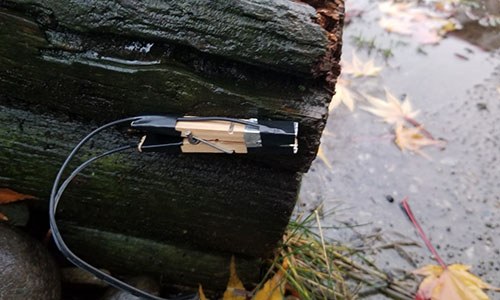
First Step – Wrap the jaws of the clothespin with metal tape so that they are wrapped all around. This is what completes the circuit so make sure that the only place the two sides touch is where the jaws of the clothespin meet.
Second Step– Split and strip the ends of the two-lead wire then attach one lead to the outside of one of the jaws of the clothespin with a piece of electrical tape. Repeat for the other side and secure the wire to the clothespin further with a wrap of tape.
Third Step – Construct the circuit by connecting the positive of the battery to the resistor then to the anode of the LED.
Then – Split and strip the other end of the twin lead wire and connect one of them to the negative terminal and the other to the free lead of the LED.
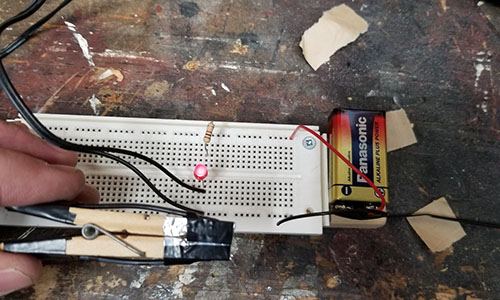
Step Five – Test the circuit and the brightness of the LED. You may want to change the resistor value to increase the LED brightness.
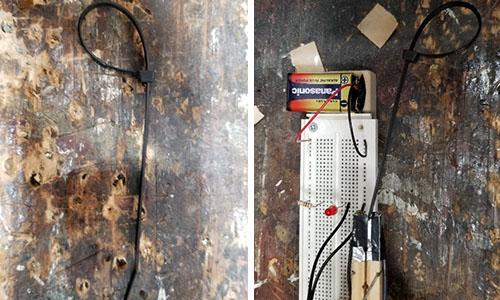
Step Six – Use a zip tie that has been fashioned into a loop as a non-conductive trigger for the tripwire.
Step Seven – Place the trigger and set the tripwire. I like to use a nail or screw through the hollow part of the clothespin spring to secure it.
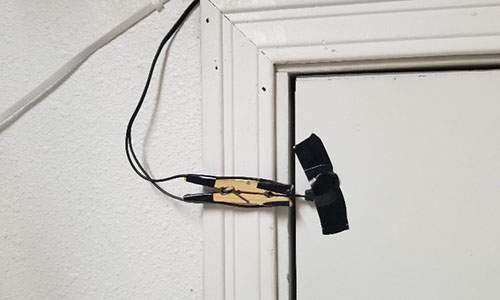
This trigger can also be placed on doorways as well by securing the zip tie to the door and the trigger to the door frame.
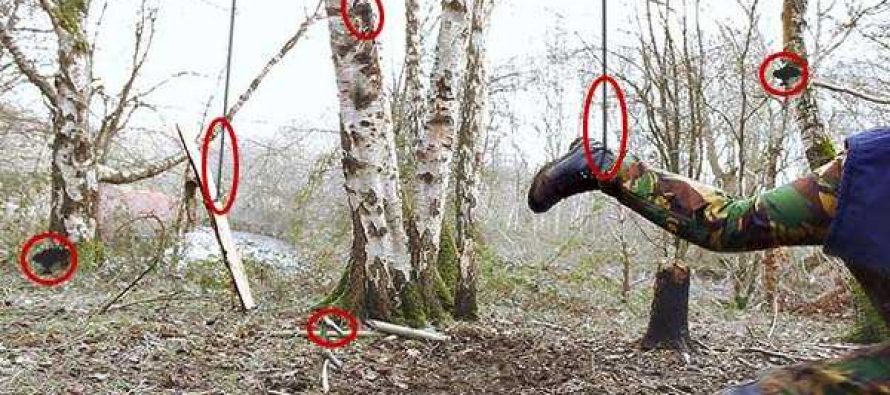
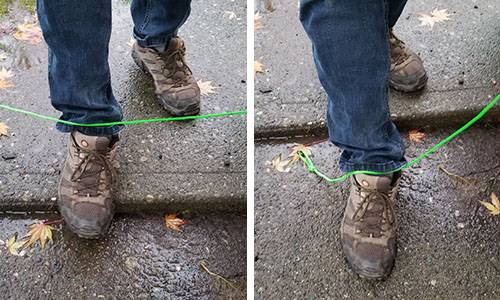
Placement
These devices are useless if you place them where no one would walk. The best way to figure out where to set these devices is to approach your house from the perspective of someone who would want to break in. Look for areas that provide good cover from view and identify avenues of ingress that a looter or other criminal would likely use.
If you place them in areas that are often used by yourself or your family be sure that everyone is very aware of the locations of each trap. Also, be aware of any possible four-legged intruders as well because you may have to adjust the heights of the tripwires to avoid false alarms.
The advantage of early warning systems such as these is that in a lot of instances the materials for these are laying around the garage or homestead.
The rat trap versions are good for placing at longer distances and if you have access to night vision and IR glowsticks they can be an almost invisible version of a trip flare.
While the LED version takes a lot of experimentation and a bit of skill it can in a lot of ways be a better early warning system because it only requires one person to be aware of and looking at one set of lights rather than trying to keep watch of several glowstick traps.
